355 Days

Wife, mechanic, gardener, animal lover, artists, cook and student of life. I like to talk about all of it.

Thursday 31 January 2013

Black Bean Soup

You've probably noticed that my recipes are simple.  I am not opposed to complicated recipes but for the most part I keep to the KISS (Keep It Simple Squeaky!) method of cooking.  My black bean soup recipe is no different, minimal ingredients and amazing flavour.

I use dried beans for two reasons.  1. I buy them cheap in bulk and they are easy to store. 2. I live in Australia and it's difficult to find canned black beans.  There are a lot of opinions about which are better for you but that is for another post.  Today is all about making soup.

You'll need:

4 cups of soaked or 2 15 oz (450ml) cans of black beans
1 1/2 cup vegetable
1 cup chunky salsa
1 tsp ground cumin
1 small can of corn kernels which I forgot to add.


Get your dried beans soaking.  I used 1 3/4 cups dried beans.
When they swell it will be to more than twice their original size.
I am going to need 4 cups of soaked beans.


Put them in a pot and cover with water.
Water level should be 2 inches over the level of beans.
The next day I rinsed (3 times) my beans and now they
are ready for my soup.
Add 3 3/4 cups of beans to the food processor (save 1/4 cup as whole beans)
Pour in broth.


Add one cup of chunky salsa.  Can be as hot or mild as you like. 


Mix it up! I did about one minute on medium to high speed.

This is the mixed up soup.  Not too pretty but it will taste good.

Remember that 1/4 of whole beans we set aside?  Add them to your mix.
Add your cumin and
you can add a small can of corn kernels too I forgot mine. 

Bring it to a boil then reduce the heat and let it simmer
for an additional 20 minutes.
It's really thick.  For a thinner consistency use canned beans. 

Serve with a dollop of sour cream and enjoy.

This soup freezes beautifully so make extra and put it aside for a rainy day. 

Wednesday 30 January 2013

Ginger, honey & lemon tea

I have been a little under the weather.  While won't bore you with the details of my malaise, I can tell you that I don't like antibiotics and only take them if really necessary.  To try to get on the other side of this I've decided to make a cup of healing tea.

Ginger has many benefits and is know to be good for sinus problems, it relieves inflammation in joints, calms upset tummies and eases headaches.   As a cautionary note it can react poorly with some medications so you should check into that if you are taking anything.  

Honey is amazing for soothing sore throats, it's antibacterial and it sweetens the tea.  Lemon also has healing properties and is known to boost the immune system.  Yes, you can buy a lemon, honey and ginger tea bag but nothing is as good as fresh ingredients.  When they are fresh they are more potent.

Get to feeling better ginger, honey & lemon tea:

You'll need:

Fresh ginger
1/2 Lemon
Honey
Water

First you need to peel your ginger.  You can use a vegetable peeler or  a knife.

You'll need 5 or more slices of ginger depending on how strong you want your tea.
Ginger has zing so you may need to get used to the flavour. 
You need to slice it thinly.  It could be thinner than this but I'm sick so give me a break. 

Liquid gold.  I added a big spoonful of honey.  

Squeeze the juice of half a lemon.
Boil your ginger for 10 to 20 minutes.  20 minutes for stronger flavour.

Strain your tea into a mug.

Mix it up and drink it down.

You don't have to be sick to drink it.  It tastes very nice and is as good as a preventative measure as it is a symptom reliever.

Monday 28 January 2013

Cheap window frosting

Several months ago I decided it was time to do something with my eye sore of a garage window. When we moved in we hastily threw up an old sheet to stop people seeing into our garage and there it has stayed.  Collecting dirt, dust and cobwebs every time I walked in to the garage it just nagged at me to do something.  I needed to clean up the area, allow light in and I wanted to do it really affordably.  

After much consideration frosting seamed the logical option.  I had considered painting it with Glass Frosting Aerosol Spray Paint.  I'd used it to make those sun jars with the solar lights in them but I'd discovered that over time the paint peeled off of some of them.  Usually it was because they'd been exposed to moisture.  In the garage there is potential for it to be exposed to petroleum based products and moisture.  If it were to bubble up or peel it would look terrible. I found my solution when I came across a lady who'd used clear contact paper on her kitchen doors.  On the window the contact paper looks like frosting.  The best part is if you get sick of it you can just peel it off.  

Here is my DIY garage window frosting makeover.


The before shot.  We had an old sheet held up with a shower curtain rod.  It allowed some light in but was too dark and way too ugly!


Behind the sheet curtain. It was so gross and dirty with tons of spider webs, dead bugs and egg sacks.  

Contact paper or PVC self-adhesive film.  I got mine at a local shop for about $4 a roll and I used 3 rolls. 

The naked window thoroughly washed and free of webs.

My contact paper.
I chose the "clear chess" pattern because I thought it would look pretty on the window.  Any clear pattern would work.  Notice the blue grid printed on the paper?  It's really useful when cutting the paper to fit the window.  Unroll the paper and hold it up to the window to measure. Measure twice. Then cut it.
If you have excess you can trim it later. 


BEFORE you try to stick it to the window spray the glass with glass cleaner.  It will allow you to slide the contact paper around to center it.  Peel the sticky contact paper from the paper. Once its on, use a card to gently push the bubbles and wrinkles to the edge.  If it get's to sticky just peel it back and spray on more glass cleaner.
You can use a blade to trim excess.  Use towels to mop up the glass cleaner that get's pushed out. 

Be gentle! I got a little bit crazy and tore my contact paper.  You can't repair it so I had to throw it away and start again.
You can see the cool check design in this photo. 
Here is my window with 3/4 of the pane done.  You can see that it still lets light through but its defused and you can't make out objects on the other side.  

All done.
You can see seams between the sheets of contact paper. I wouldn't use this on large windows in my house but for the garage it's just fine. 

You can really see the seams from this angle but again, for the garage it's fine.  If you had small windows like in the bathroom (or big contact paper) I think this would be a great option.
I used glass cleaner, an exacto knife, ladder, paper towels, scissors and about an hour of my time. It took 3 rolls of contact paper (excluding the piece I damaged) for a total of about $12.   Here is the side by side before and after.  Much cleaner, it's brighter (although the photos don't show it very well), it's tidy and for $12 it was an easy upgrade. 


Sunday 27 January 2013

GF Peanut Butter Cookies

Gluten Free Peanut Butter Cookies

This is one of my favourite cookie recipes.  It's easy, I always have the ingredients on hand and it was taught to me by my completely awesome step-daughter. They are what I take to parties and events where you need to bring a plate and everyone loves them.  I am constantly asked for the recipe by my celiac friends.  Best of all you only need only three ingredients.

What you need:

1 cup of chunky peanut butter 
1 cup of sugar
2 eggs


I like super chunk because you get little pieces of nuts in your cookies but you can use any peanut butter. 


You can use raw or white sugar.  This is what I have on hand at the moment. 


Beat your eggs and sugar then stir in the peanut butter until it's equally mixed.  Drop spoonfuls onto a greased cookie sheet or baking paper.  Bake at 175C/350F for 20 minutes.  

Cool on your rack and enjoy!


They are crispy on the outside and chewy on the inside.  

Gluten free, simple and delicious. 
I hope you enjoy them!


Saturday 26 January 2013

Simple Egg Salad

I love egg salad. I like it simple, without dill or onion, and I love crunchy vegetables in it.  Here is my super easy egg salad recipe. 

You will need:

1 dozen eggs
2 carrots
3 celery stalks
1/2 cup mayo
1/4 cup yellow mustard
half lemon
salt & pepper to taste

First you need to hard boil your eggs.  The best method I know is to fill a pot with eggs and cold water.  Put them over med/high heat on the stove.  Once they come to a boil start the timer and cook for 20 minutes.  (I recently discovered that a tablespoon of baking soda/bicarb makes the shells easier to peel.)  After cooking your eggs immediately bathe them in cold water.  This stops them from cooking and allows them to cool for peeling.  You can add ice to the water to speed up the process.  If you try to make egg salad with hot eggs it won't be very nice. 


I put the peeled eggs in a bowl of cold water on the left and on the right I collect the shells.  (I put them in the garden to keep snails off my plants.)  See how nice the shells peels off?  That's the baking soda added to the water. 
One dozen hard boiled eggs, cooled and peeled.

My lemon, carrots and celery washed and trimmed. 

You'll need an egg slicer. 

 You have to slice the egg both ways so you have diced egg.


All my eggs diced up and ready to go.

Chop your carrots. 

Add your carrots to the egg mix.

Chop your celery and throw it in the mix!

Add 1/2 cup of mayonnaise.  I use Best Foods Real Mayonnaise.


Add 1/4 cup of yellow mustard. I use French's Classic Yellow.  


Roll your lemon before you slice it to maximize the juice you'll extract from it.

Half a lemon and my totally cute mason jar salt and pepper shakers.
Salt and pepper to taste, lemon juice and mix mix mix!

Egg salad on toast!  So good and crunchy I hope you enjoy it!

Got half a lemon left over?  Juice it, add sugar and use it as a face scrub.  It works really well!

Friday 25 January 2013

Happy Australia Day!

Today is Australia Day the day we commemorate when the First Fleet arrived at Sydney Cove in 1788.

I first arrived in Australia in November of 2004.   My husband and I planned to stay until January but someone made us an offer we couldn't refuse and we decided to stay.  It was January 16th when we sat on the edge of the bed with non-refundable plane tickets in hand and asked ourselves, "Are we really doing this? We're moving to another country?"  We did.  Here is my favourite story about moving and my first impression of Australia.

We flew from Reno to San Francisco and then to Sydney.  We'd been traveling for nearly 24 hours and we were exhausted.  On the airplane we were given a form to fill out for customs, did we have any prohibited or regulated items to declare.  I looked at the form that listed weapons, alcohol and food items that were controlled. I didn't have any of those so I didn't declare anything.  When we got to customs they scanned our bags, the bells went off and lights flashed.  A young male officer pointed to me and shouted, "Is this your bag?" I said it was and wondered what could have possibly caused the concern.
"Do you have lollies?!?!" He yelled at me I shook my head, "I don't know"  He shouted again "Do you have lollies?!?"  I was scared.  What was this lollies?  Were they drugs? Did someone put drugs in my bag? OMG was I going to be strip searched and body cavity inspected?  Where did this all go wrong?  "Lollies do you have lollies" shouted the young man with the thick accent.  I was on the verge of tears, "I don't know, I don't know if I have lollies.  What's lollies?"  My jet lagged mind raced and my heart beat quickened.  Officers began to look our way and walk toward the area of concern.  Just then a female officer put her hand on the shouting officers shoulder and, in a tender voice, said to me, "Candy honey, do you have any candy?"  I shook my head "Yes! Yes, I have candy!" That beautiful Ghiradelli chocolate that I'd picked up in San Francisco was the source of all this drama.   The young officer seemed annoyed as they finished searching our bags.  My heart beat slowed and they released us and our renegade chocolate into Australia.  That was my welcome to the land down under.

Six months later we returned to the US to pack our belongings and put things in order.  As we walked through customs I was again asked if we had any food items.  Quickly I announced, "I have candy" The jolly, white haired customs agent declared "Candy's ok, welcome home."

The first year in Australia was a lot like our introduction to customs.  There were a lot of misunderstandings as I learned a whole new english language.  Some people welcomed us and some did little to hide their dismay at having foreigners coming into "their" country.  We stuck it out and I'm so pleased that we did.  Once I had friends, a home, pets and a sense of my place in the community I had a life.   Last year we received Australian citizenship and I am proud to call myself an Aussie. I'm proud to call myself American too.  I love that I have two countries that will welcome me home, me and my candy.
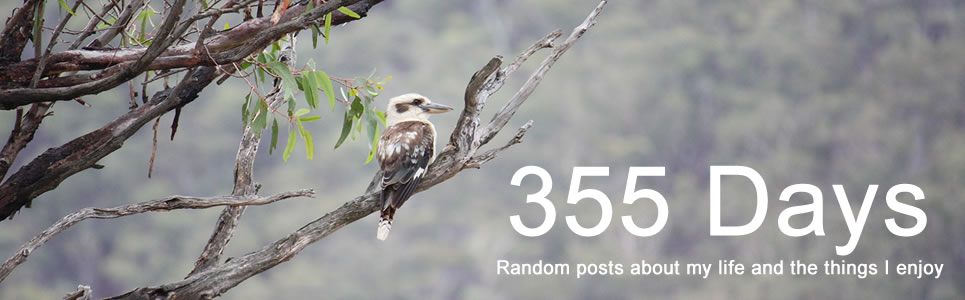
A photo I took of a kookaburra.